


Lots has happened here today on the robot front. I'd like to say there's been a lot of progress but it feels like its been one step forward one step back all day.
Initially it was going quite well, with the first motor mount made:
All good so farNext I started making the other three motor mounts. After the second one the blade started melting the polycarbonate rather than cutting it. I didn't notice until I'd got to the last one :-( I've no idea what had changed; maybe the blade just started heating up. I'd been using my Dremel with a sanding drum to clean up the inside of the holes so I didn't think it would be too much of a hassle to sand away the molten plastic as the part still looked intact. Unfortunately my only sanding drum ripped as soon as I started sanding it :-(
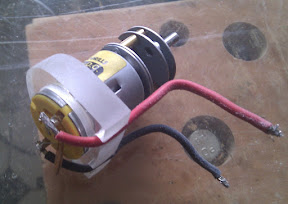
Taking a break from the cutting and sanding, I next started modifying the motors. I knew I didn't want to use the standard mounts they came with so I took one apart to see if they'd work without the mounts. From a quick inspection of the 250:! gearbox it looked like they would work fine

So after the first one worked
Can anyone recommend a suitable gear puller for removing the pinions off 280 size motors?
After numerous other attempts at making a decent round hole, I finally figured out I could use my router to make the holes, eliminating the sanding. Here's the result:
I thought I'd mount the frame rails to the armour (one piece wrap around 3mm polycarbonate according to the design) before deciding how to arrange the wiring. I cut the armour out with scissors and noticed it was probably a little too thick to just bend around the frame rails cold, so I started heating it up whilst bent:
It was going ok until I got a little lazy, didn't keep the heat gun moving enough and overheated it, causing lots of little, weakening, bubbles
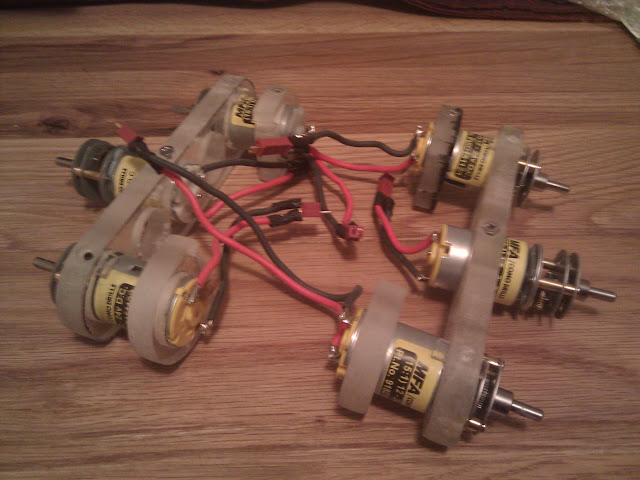
Here's the assemble:
Not too bad but the armour's a bit of a mess and the wheels don't all point forwards
With it assembled I then started soldering the wiring harness:
Again, not perfect but everything's insulated and secure, or so I thought...
I connected it up to the motors and twiddled with the receiver. Everything worked!
I removed everything from the bot, laid it out and checked for shorts. Nothing I could see. So I plugged the battery in again. This time the blue light came on and one motor started moving, but almost immediately there was another noise, the light went out and the motor stopped. Even when I disconnected all the motors the speed controller's light still won't come on when powered up :-(
On the plus side, I weighed everything I've got so far, and, according to my crappy scales, It's 50grams lighter than the cad model predicts
Not sure what to do tomorrow though....
- FRA
- Forum
- Robots
- Events
- Media
- What's New?
All times are GMT. The time now is 06:16.


 Reply With Quote
Bookmarks